If you are fed up with theoretical information on 3D modeling and are looking for some practical tips from experienced 3D modelers, who have designed the largest scaled, high detail fidelity, 1m+ Millennium Falcon model for 3D printing, this article will shed light on such aspects as software, and 3D modeling for 3D printing.
Expert modelers share their view on 3D modeling software
The truth is that there is no perfect 3D modeling software that can be recommended to every 3D modeler. It all depends on the 3D modeler’s preferences and way of working. Some of the most appreciated software for 3D modeling among experienced 3D designers is Autodesk MAYA, ZBrush, and MUDBOX.
ZBrush and MUDBOX are 2 of the big players sculpting tools that are largely used for 3D modeling of game-related or any other figurines. They are completely different but have similar functionalities and features. Again, it all depends on the 3D modeler’s preferences, experience, and working habits.
For the sake of comparison, we will be analyzing some sculpting applications from the perspective of an experienced 3D modeler, who has been modeling in these apps for a while now.
MUDBOX, a digital painting and sculpting software, is considered to be a little bit more intuitive and easy to absorb software. Being developed by the same company as Maya and 3DS Max, MUDBOX can be the perfect choice for those who are familiar with working in this type of software. It allows the transfer of image plains, meshes and textures between these three applications.
This feature is highly appreciated by 3D modelers that intend to work in all these modeling apps because it ensures a smooth and seamless workflow. MUDBOX supports Photoshop painting technology, allowing multiple painting options that Photoshop users are familiar with.
The application has a lot of 3D brush tools, which makes the creation and adjustment of the 3D model a lot easier and creative. It has 22 different layer blend modes compatible with Adobe Photoshop.
ZBrush is aimed more at the artist, than at the developer. It allows creating stunning illustrations with the wide availability of painting tools. The illustrations can then either be used as image plains for further development or as a reference for 3D model creation.
ZBrush brush tools make the modification of the model simpler. The polygroups tool makes it possible for modelers to create new items or models by grouping items. The application has a set of inflate, clay buildup and move brush tools that permit artists to create a model according to their own approach.
ZBrush is considered by experienced modelers a more intuitive and artistically oriented application, allowing modelers full control over the creation process, and putting at their disposal a wide range of tools that enable them to create realistic models. ZBrush allows modelers to cut from the geometry of the model and to sculpt even the less accessible parts of a model in a simple and effortless way. Models can easily be modified and adjusted in the most accurate way.
MAYA has a more intuitive interface and it makes easier for the modeler to access different sculpting tools during the modeling process. Due to its user-friendly layout, this software is recommended for those who are just at the beginning, acquiring modeling skills.
It will facilitate learning and will help them form habits which will prove useful in the future. MAYA application has rig, skinning, animation (any animation studio uses MAYA), dynamics and ndynamics (simulation of any attractive properties (SPH particle-based simulation technique) like fire, wind, liquid with outstanding realism) plug-ins.
MAYA 2016 version has undergone excellent improvements: it features sculpting tools, which makes it possible for the 3D modeler to create the model in MAYA, without the need to shift to MUDBOX or ZBrush applications. MAYA enables modelers to implement rigging and skinning tools. Rigging allows positioning the model in a certain pose.
Skinning helps to change the proxy mesh according to the original mesh. These two tools are available in automatic and manual script. They are difficult for the beginners. That’s why it is recommended to use automatic skinning and rigging setup tools for the first period. However, the manual rigging and skinning of a model yield much better results.
Having said all this, it needs to be stressed out that every 3D modeler is free to choose a modeling and sculpting software that best responds to his own needs, skills, and preferences.
Advice for effective modeling for 3D printing
# 1. Create water-tight mesh
3D modeling for games, movies, and animation differs from the 3D modeling for printing. This difference consists in the fact that the mesh for 3D printing must be water-tight, i.e. free of any holes, with closed edges, making up a solid volume. This is required because when sending a model to the printer, the G_CODE will read flipped normals as holes and will not print the polygon mesh.
#2 Entering Wall-thickness Value
The mesh must be completely solid, without holes or any other unmotivated spaces. If, however, the mesh has a hole or a motivated space, the polygon surface must have a certain thickness. The thickness value is entered by the user.
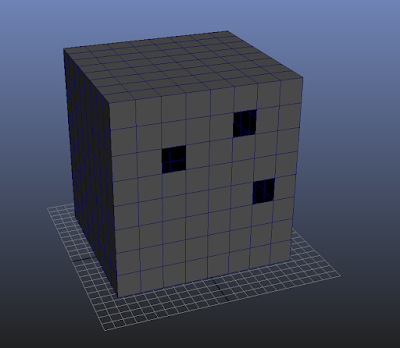
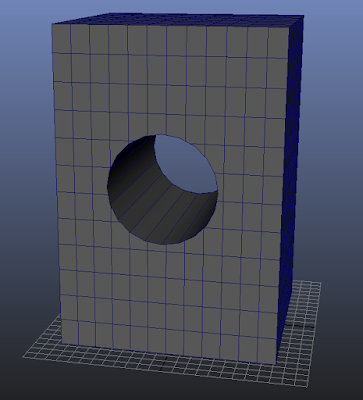
# 3. Closing object’s interior free gaps
If the mesh consists of holes, as shown below, it is recommended to close the free gaps from the interior of the object.
# 4. Primitive elements to create complex objects
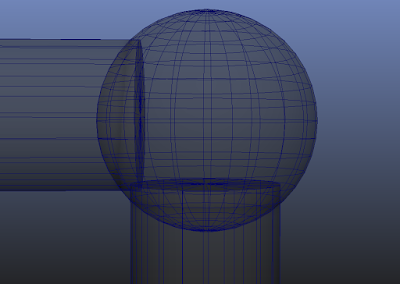
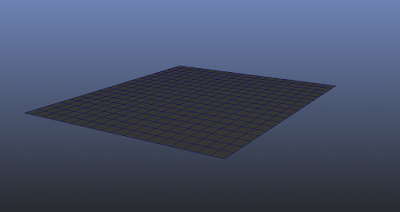
Any model created in MAYA or 3D MAX consists of several separate elements (modified primitive elements). The primitive elements group includes sphere, cube, cylinder, cone, plane, torus, and etc. When these primitive elements are modified, the modeler can obtain different shapes.
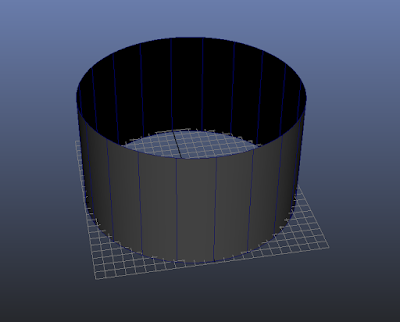
E.g.: We have a cylinder:

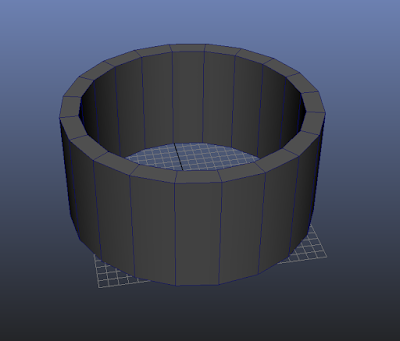
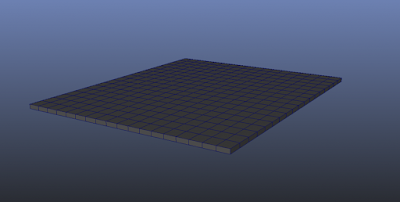
After modifying and adjusting it according to the modeler’s needs, the element takes the following shape:
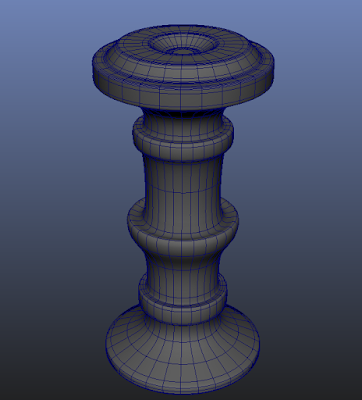
When joined together, these primitive elements are capable of sculpting and shaping entire models, as seen in the pictures below.
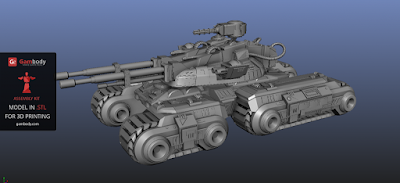
Mammoth Tank 3D model designed for 3D printing
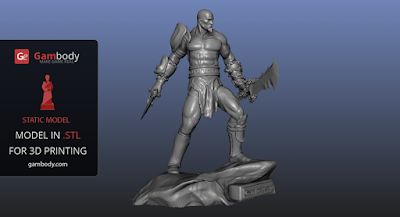
Kratos model for 3D printing
Lifestealer N’AIX 3D print model
When creating this type of 3D printing models it is advised to pay attention to several critical things to get a clean, error-free and hole-free model.# 5. Combining several primitive elements
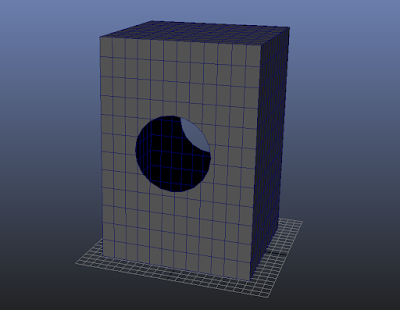
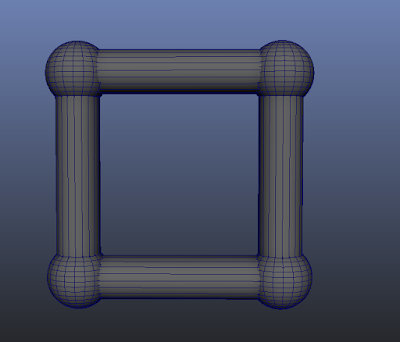
Several primitive elements must be combined in such a way as to avoid the creation of free space between them.
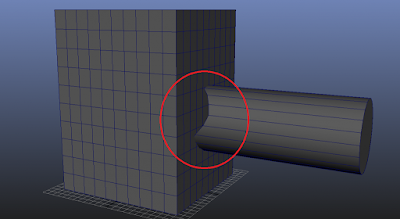
The printer will read this free gaps as a hole and you risk getting a negative result (unless the hole is not created purposefully by the 3D modeler). For a good printing result, your mesh should look like this:
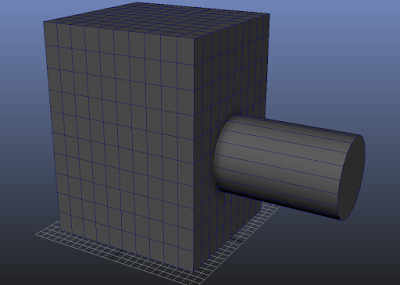
If there are several objects, 4 spheres and 4 cylinders with no connecting points between them, i.e. they don’t make up a single object, even though situated close one to another, the printer will print them separately, as 4 separate spheres and 4 separate cylinders.
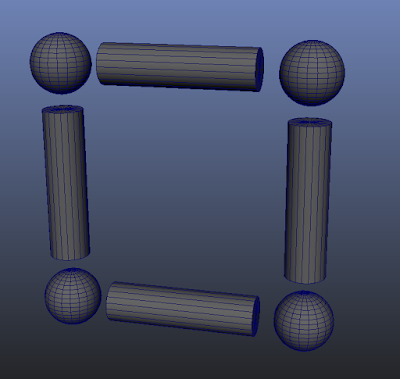
When joining these elements together the printer will print them as a single object because there are no free spaces between them and all these elements make up a single object. This is how complex figures, with high detail fidelity, are modeled.
If you have experience in modeling HI-POLY (a multiple polygon model enabling the modeler to create an object rich in details) models from a primitive element, you should pay attention to the model’s wall thickness. If the model’s walls are too thin, the printer won’t be able to print them.
Every model’s walls should have minimum wall thickness.
# 6. Converting the mesh in files for 3D printing
All created models are then exported in .STL or .OBJ file format. Any 3D modeling software has the feature to export the model in .STL file format. The .STL exported file can then be printed using G-CODE converted programs, such as CURA, REPETIER-HOST, and etc.
Before being sent to print, however, it is recommended to check the .STL file in NETFABB for any potential errors and to optimize it for 3D printing. It is also possible to change the model’s size and to rotate it, thus preparing it for 3D printing.
Proper 3D printer configuration to avoid ruining your model
Now that your file is error-free and optimized for 3D printing, all that remains is to configure your 3D printer correctly. Every 3D printer has its own specific features and it comes with a user guide to help you configure and set it up.
If all printing parameters are accurate, the print bed is leveled, you carry out the technical maintenance of your 3D printer regularly, and the plastic you use for 3D printing of your model is of high quality, the printing process will run smoothly.
All detailed instructions on how to level your 3D printer’s print bed and how to maintain the printer are available on the manufacturer’s website. It is crucial for you to read the manufacturer’s guidelines and to follow them strictly, thus increasing your 3D printer’s lifespan and the accuracy of your printed models.
Wrapping up
3D modeling might sound difficult than it really is. Don’t be afraid to experiment. There are a lot of materials, resources, and video tutorials online that will be of great help. The 3D modelers’ community is constantly increasing and joining it will open new horizons. You can also get in touch with professional 3D designers via multiple 3D modeling online channels and forums and ask for help and assistance whenever needed. Tag: 3D Printer News , 3D Printers User Guide


 Return to top of page