Random fill layers / Voids being closed up
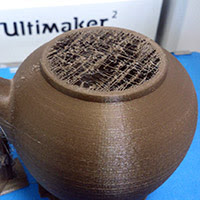
The example image shows a part where the opening at the top has a single fill layer covering it. You might also find that voids inside your model are either completely filled or randomly filled by infill layers. This happens due to errors in the model file that confuses the slicer. You can often spot these errors by viewing the model in "X-Ray" mode which you can activate by clicking the large button in the top right of the model window in cura. Any areas showing up as red are problem areas that will potentially cause issues.
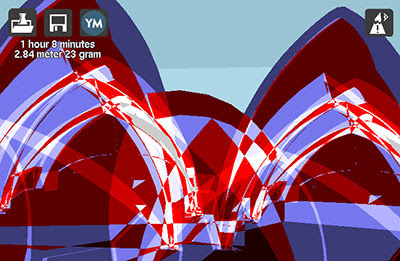
This model shows a whole heap of errors. You do not want any red areas at all when viewing your model in X-Ray mode.
cura has a number of options grouped under the "Fix horrible" heading in the expert settings. Knowing which option to enable/disable or which combinations will work is simply down to trial and error. Switch to "Layers" mode with the same button as before and inspect the trouble areas as you try different combinations. It should be noted that enabling these options for a model that isn't faulty can actually make the model slice incorrectly (see the image below).
A better option might be to repair the model so that the problem doesn't present in the first place. Netfabb offers a free cloud based service that will attempt to heal models for you. Since it's free it's well worth giving it a shot. You can find the service here.
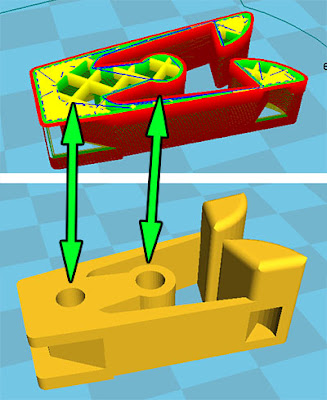
This image clearly shows how the sliced file does not represent what you would expect. Where the holes should be there is now infill. What's interesting is that the file is actually perfectly fine but by accident the "Combine everything (Type-B)" checkbox under "Fix horrible" was checked. With that option unchecked the file sliced without issues.
First layer not sticking / Parts coming loose
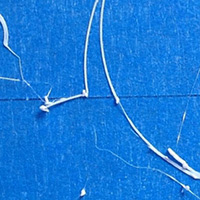
By far the most common issue here is simply that you haven't properly levelled your print bed. It is very important that the bed is perfectly level in relation to the movement of the print head and that the starting distance from the nozzle is as close to perfect as possible. If the first layer starts just slightly too high the plastic will not be squished into the print bed properly and will therefore not stick and stay in place. You might also find that the parts are detaching before the print is completed.
When you first started your machine you were guided through a bed levelling wizard, you can re-start this at any time. Start the wizard with Maintenance -> Buildplate. Internally the firmware expects the bed to be 0.1mm from the nozzle tip at the end of the wizard. It just so happens that a sheet of standard 80gr printer paper is usually of this thickness and can be used as a crude feeler gauge. You want the paper to be able to slide in under the nozzle but you should feel a bit of drag/scraping on the paper. As you get more confident you might find that it's easier to simply look along the glass and visually set the correct height. You want the nozzle to be very close to touching its own reflection without actually touching.
You might have to re-do this procedure a couple of times to get it right, it'll get easier with time and luckily the Ultimaker2 build platform is very stable and rarely needs to be re-calibrated.
You can also adjust the levelling on the fly as the printer is laying down the first layer. Simply use the thumbscrews underneath the platform.
You'll find an image showing an example of a good first layer in the warping section.
It is also very important that your print bed is clean (glue is an exception of course) and free from oils from your fingers. If you've touched your print bed a lot the oils from your fingers can prevent or make it harder for the plastic to stick properly. To promote stickiness your machine was delivered with a stick of glue. Using glue is optional but tends to help quite a bit. Don't go crazy with the glue though, more is not better. Clean your glass plate and then spread a bit of the glue onto it. With a damp piece of paper or cloth spread the glue out over the bed and let it dry (starting a print that uses the heated bed will make it dry quickly). After the water evaporates you will be left with a very thin layer of glue.
If you're printing on a cold bed with blue painters tape, like on the Ultimaker Original, it is very helpful to wipe the tape down with some alcohol. The tape is covered with a waxy substance that can make it harder for the parts to stick. This isn't always needed but it's something to keep in mind.
Tag:
3D Printers User Guide


 Return to top of page