Reviews and share for a better life...

Best 3D Printer, MakerGear M2 Desktop 3D Printer


MakerGear M2 Desktop 3D Printer : Fast, Sleek and Beautiful!!

Technical specifications include:
Black Powder-Coated Rigid Steel Frame
CNC Machined Black Anodized-Aluminum Axes Mounts
Precision X & Y Linear Rails
Precision Ground and Polished Steel Shafting
4-Start Lead Screw with Integrated NEMA 17 Stepper
Assembled MakerGear 1.75mm Stepper Plastruder - works with ABS and PLA
Low Maintenance
8" x 10" x 8" Build Area
Platform Heater Included (not shown)
All-in-one open source electronics
Includes 1K Spool of 1.75mm PLA Plastic Filament
[Read more...]

Bed leveling for 3D Printer ULTIMAKER 2 EXTENDED+


Bed leveling
As explained in the Get Started section the first layer of a print is very important. Therefore regular bed leveling is advised. Always re-level the build plate when you notice that the plastic is not equally placed on the glass plate. After transportation of your Ultimaker 2 Extended+, it is also advised to re-level the build plate to ensure your 3D prints stick well to the build plate.
To start the bed leveling process on your Ultimaker 2 Extended+, go to "Maintenance" > "Buildplate". Wait for the Ultimaker 2 Extended+ to do its homing procedure and continue when the print head is in the center at the back of the build plate.
Setting the height
Roughly set the height of the build plate by rotating the button at the front until there is approximately 1 mm distance between the nozzle and the build plate. The measurement here is not critical; just make sure that the nozzle is close to the build plate without touching it.
Rough leveling
Adjust the front left and front right build plate screw to roughly level the build plate at the front side. Again, there should be a distance of approximately 1 mm between the nozzle and build plate. Turn the build plate screws to the left to move the build plate closer to the nozzle.
Fine-tuning
The last step will be fine-tuning of the build plate with the calibration card. Place the calibration card between the nozzle and build plate on all 3 points and adjust the build plate screws until you feel slight friction when moving the card.
Note: Don't push on the build plate while fine-tuning with the calibration card. This will lead to inaccuracies.
[Read more...]

Unpacking the Afinia H800 3D Printer


The Afinia H800 3D Printer weighs over 40 pounds and should be team-lifted!
Remove the power cord and 4 perf boards from the top foam piece.
Remove top foam from the box. Lift the foam ring from around the printer.
With two people, carefully lift the Printer from the box.
Lift the foam sheet below the printer and remove the Accessory Pack,
Power Supply, Putty Knife, and Snipping Pliers.
Lift the top cover and carefully lift out the foam above the platform.
Open the front door and carefully remove the two pieces of foam from under the platform. Tip each foam piece back until it is lying flat, then turn the foam counter-clockwise until the left end of the foam is through the door.

Use the snipping pliers to carefully cut the 6 labeled retaining strap loops from around the Print Head rails near the top of the printer.
Cut only the straps!

Next, check the Accessories:

• Reel of Filament (1, Natural/White)
• Power Supply
• Power Cable
• USB Cable
• FR-4 (Perf) Boards
• Extra Nozzle
• Nozzle Wrench
• Hex Wrenches
• Putty Knife
• Snipping Pliers
[Read more...]

Practical Tips for Creating 3D Models for 3D Printing


3D modeling has become a sought after activity by many 3D printing enthusiasts. Used across many industries, 3D modeling opens new opportunities. But modeling for 3D printing can be confusing. All 3D modelers use different modeling approaches, software, materials, printers, and it is normal to feel lost when attempting to create a perfect 3D model for 3D printing.
If you are fed up with theoretical information on 3D modeling and are looking for some practical tips from experienced 3D modelers, who have designed the largest scaled, high detail fidelity, 1m+ Millennium Falcon model for 3D printing, this article will shed light on such aspects as software, and 3D modeling for 3D printing. 
Expert modelers share their view on 3D modeling software
The truth is that there is no perfect 3D modeling software that can be recommended to every 3D modeler. It all depends on the 3D modeler’s preferences and way of working. Some of the most appreciated software for 3D modeling among experienced 3D designers is Autodesk MAYA, ZBrush, and MUDBOX.
ZBrush and MUDBOX are 2 of the big players sculpting tools that are largely used for 3D modeling of game-related or any other figurines. They are completely different but have similar functionalities and features. Again, it all depends on the 3D modeler’s preferences, experience, and working habits.
For the sake of comparison, we will be analyzing some sculpting applications from the perspective of an experienced 3D modeler, who has been modeling in these apps for a while now.
MUDBOX, a digital painting and sculpting software, is considered to be a little bit more intuitive and easy to absorb software. Being developed by the same company as Maya and 3DS Max, MUDBOX can be the perfect choice for those who are familiar with working in this type of software. It allows the transfer of image plains, meshes and textures between these three applications.
This feature is highly appreciated by 3D modelers that intend to work in all these modeling apps because it ensures a smooth and seamless workflow. MUDBOX supports Photoshop painting technology, allowing multiple painting options that Photoshop users are familiar with.
The application has a lot of 3D brush tools, which makes the creation and adjustment of the 3D model a lot easier and creative. It has 22 different layer blend modes compatible with Adobe Photoshop.
ZBrush is aimed more at the artist, than at the developer. It allows creating stunning illustrations with the wide availability of painting tools. The illustrations can then either be used as image plains for further development or as a reference for 3D model creation.
ZBrush brush tools make the modification of the model simpler. The polygroups tool makes it possible for modelers to create new items or models by grouping items. The application has a set of inflate, clay buildup and move brush tools that permit artists to create a model according to their own approach.
ZBrush is considered by experienced modelers a more intuitive and artistically oriented application, allowing modelers full control over the creation process, and putting at their disposal a wide range of tools that enable them to create realistic models. ZBrush allows modelers to cut from the geometry of the model and to sculpt even the less accessible parts of a model in a simple and effortless way. Models can easily be modified and adjusted in the most accurate way.
MAYA has a more intuitive interface and it makes easier for the modeler to access different sculpting tools during the modeling process. Due to its user-friendly layout, this software is recommended for those who are just at the beginning, acquiring modeling skills.
It will facilitate learning and will help them form habits which will prove useful in the future. MAYA application has rig, skinning, animation (any animation studio uses MAYA), dynamics and ndynamics (simulation of any attractive properties (SPH particle-based simulation technique) like fire, wind, liquid with outstanding realism) plug-ins.
MAYA 2016 version has undergone excellent improvements: it features sculpting tools, which makes it possible for the 3D modeler to create the model in MAYA, without the need to shift to MUDBOX or ZBrush applications. MAYA enables modelers to implement rigging and skinning tools. Rigging allows positioning the model in a certain pose.
Skinning helps to change the proxy mesh according to the original mesh. These two tools are available in automatic and manual script. They are difficult for the beginners. That’s why it is recommended to use automatic skinning and rigging setup tools for the first period. However, the manual rigging and skinning of a model yield much better results.
Having said all this, it needs to be stressed out that every 3D modeler is free to choose a modeling and sculpting software that best responds to his own needs, skills, and preferences.
Advice for effective modeling for 3D printing
# 1. Create water-tight mesh
3D modeling for games, movies, and animation differs from the 3D modeling for printing. This difference consists in the fact that the mesh for 3D printing must be water-tight, i.e. free of any holes, with closed edges, making up a solid volume. This is required because when sending a model to the printer, the G_CODE will read flipped normals as holes and will not print the polygon mesh.

#2 Entering Wall-thickness Value
The mesh must be completely solid, without holes or any other unmotivated spaces. If, however, the mesh has a hole or a motivated space, the polygon surface must have a certain thickness. The thickness value is entered by the user.


# 3. Closing object’s interior free gaps
If the mesh consists of holes, as shown below, it is recommended to close the free gaps from the interior of the object.


# 4. Primitive elements to create complex objects
Any model created in MAYA or 3D MAX consists of several separate elements (modified primitive elements). The primitive elements group includes sphere, cube, cylinder, cone, plane, torus, and etc. When these primitive elements are modified, the modeler can obtain different shapes.
E.g.: We have a cylinder:

After modifying and adjusting it according to the modeler’s needs, the element takes the following shape:

When joined together, these primitive elements are capable of sculpting and shaping entire models, as seen in the pictures below.

Mammoth Tank 3D model designed for 3D printing

Kratos model for 3D printing
Lifestealer N’AIX 3D print model
When creating this type of 3D printing models it is advised to pay attention to several critical things to get a clean, error-free and hole-free model.
# 5. Combining several primitive elements
Several primitive elements must be combined in such a way as to avoid the creation of free space between them.

The printer will read this free gaps as a hole and you risk getting a negative result (unless the hole is not created purposefully by the 3D modeler). For a good printing result, your mesh should look like this:

If there are several objects, 4 spheres and 4 cylinders with no connecting points between them, i.e. they don’t make up a single object, even though situated close one to another, the printer will print them separately, as 4 separate spheres and 4 separate cylinders.

When joining these elements together the printer will print them as a single object because there are no free spaces between them and all these elements make up a single object. This is how complex figures, with high detail fidelity, are modeled.


If you have experience in modeling HI-POLY (a multiple polygon model enabling the modeler to create an object rich in details) models from a primitive element, you should pay attention to the model’s wall thickness. If the model’s walls are too thin, the printer won’t be able to print them.

Every model’s walls should have minimum wall thickness.

# 6. Converting the mesh in files for 3D printing
All created models are then exported in .STL or .OBJ file format. Any 3D modeling software has the feature to export the model in .STL file format. The .STL exported file can then be printed using G-CODE converted programs, such as CURA, REPETIER-HOST, and etc.
Before being sent to print, however, it is recommended to check the .STL file in NETFABB for any potential errors and to optimize it for 3D printing. It is also possible to change the model’s size and to rotate it, thus preparing it for 3D printing.
Proper 3D printer configuration to avoid ruining your model
Now that your file is error-free and optimized for 3D printing, all that remains is to configure your 3D printer correctly. Every 3D printer has its own specific features and it comes with a user guide to help you configure and set it up.
If all printing parameters are accurate, the print bed is leveled, you carry out the technical maintenance of your 3D printer regularly, and the plastic you use for 3D printing of your model is of high quality, the printing process will run smoothly.
All detailed instructions on how to level your 3D printer’s print bed and how to maintain the printer are available on the manufacturer’s website. It is crucial for you to read the manufacturer’s guidelines and to follow them strictly, thus increasing your 3D printer’s lifespan and the accuracy of your printed models.
Wrapping up
3D modeling might sound difficult than it really is. Don’t be afraid to experiment. There are a lot of materials, resources, and video tutorials online that will be of great help. The 3D modelers’ community is constantly increasing and joining it will open new horizons. You can also get in touch with professional 3D designers via multiple 3D modeling online channels and forums and ask for help and assistance whenever needed.
[Read more...]

HD2x Airwolf 3D Printer, 5 Steps to 3D Printing


Now that we have installed the software, this section will cover the main steps to printing.
1. DESIGN OR DOWNLOAD 3D MODEL: When doing this, Keep in mind the printing
orientation and the printing material(s) that you are going to use.
PROGRAMS: Sketchup, Solidworks, Rhinoceros, etc.
WEBSITES FOR 3D MODEL DOWNLOAD: Thingiverse, GrabCad
FILE FORMAT: .SKP, .SLDPRT, .3DM, etc.
2. CONVERT TO STL FILE TYPE: “Export” or “Save As” the 3D model into an STL file type.
Make sure to include the “.stl” file extension if it does not already have it. Some
software packages may require a plug-in to export as STL (i.e. Sketchup). The Dual
Head section of Cura will discuss how to export multiple STL files.
PROGRAMS: Sketchup, Solidworks, Rhinoceros, etc.
FILE FORMAT: .STL
3. CLEAN UP STL FILE (THIS STEP IS OPTIONAL): Cleaning up the STL file may be necessary after creating it. This will help the slicing engine create the GCODE.
If you skip this step and your file will not slice correctly, bring it into Netfabb for repair.
PROGRAMS: Netfabb, MeshLab
FILE FORMAT: .STL
4. SLICING THE 3D MODEL: Other than the design process, this is the most critical step in 3D printing. This is where you will apply print settings to your 3D model (i.e.
temperature, infill, layer height). It is very important to have the right settings. Each
setting is VERY dependent on the material.
PROGRAMS: Cura
FILE FORMAT: .STL and .INI
5. PRINT: Once the GCODE has been created by the slicing engine, the model can be printed using Repetier Host or from the micro SD card.
[Read more...]

Area learning in Google Tango


Google Tango is finally here and it promises to change the world we live in, or at least map it. It’s the 3D scanning project to end all 3D scanning projects, as potentially every single phone on the planet could contribute to a Google Maps so advanced it knows how big your sofa is.
More details are coming out about this incredible new hardware and now we’re more about the area learning aspects.
It’s easy to get lost in the Big Brother connotations and people really will. Google Tango, though, serves so many other purposes. They range from locating your mobile phone to guided tours of public buildings and jazzing up multiplayer games.
How does it do it?
Cameras and a depth sensor combine to map the immediate area and give your phone or tablet a sense of spatial awareness. It works much like radar, with infrared signals, and combines them in the blink of an eye with the phone’s inbuilt accelerometers, gyroscopes and more.
Now your phone already senses movement, but this is a ‘drift’ based estimates of the phone’s own movement. In short, it isn’t very good.
The accelerometers and gyroscopes in your phone just aren’t that sophisticated, they never needed to be, so they come with a margin of error. That’s especially true if you move your phone aggressively. Lighting changes, erratic movements and more cause objects to drift out of place, because your phone has no memory and is essentially building a new image every time.
It does a good job of correcting things that have fallen out of place due to relative movement, but it’s an ongoing bodge job rather than a real solution.
Google Tango 3D maps the world
Changing the game with Tango
Tango has a memory. It builds the space and remembers it, while building a constant picture based on new movement and inputs. So it will be much more accurate.
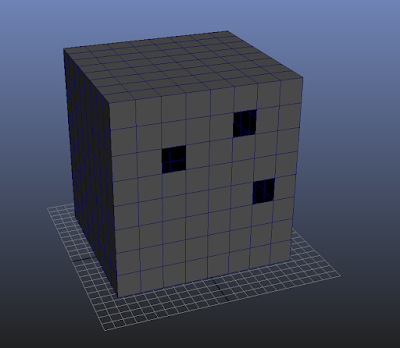
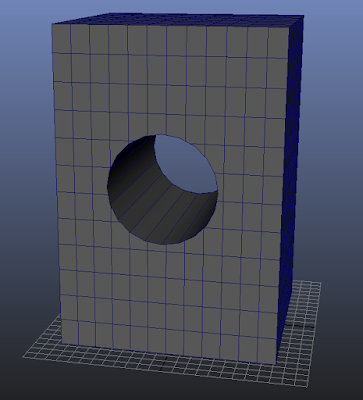
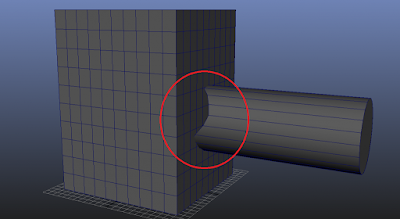
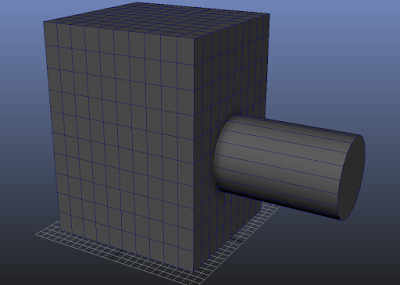
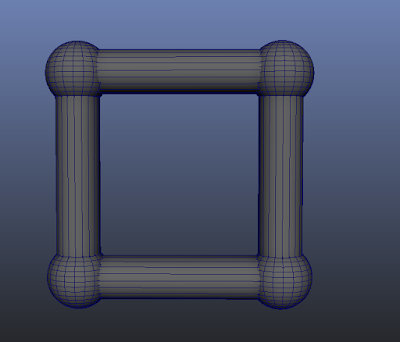
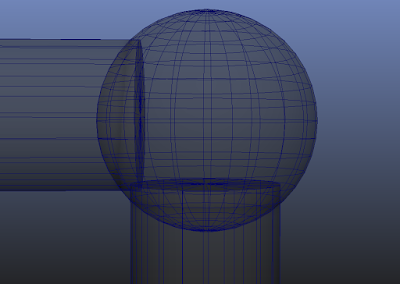
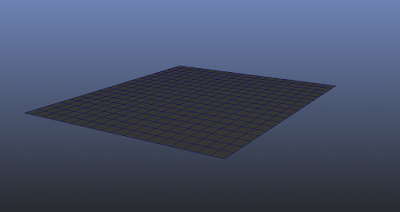
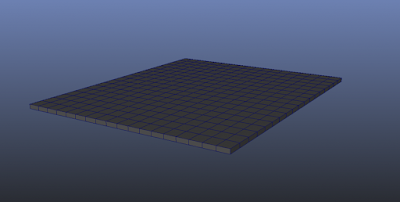
A simple demonstration of this technology was to show how an app without area learning could be convinced that a stationary box on a table had been shaken out of existence by just shaking the phone. Turning on area learning meant that the box stayed in place.
Area learning enabled devices can also transmit the complete model of the room, for instance, to another device with just a single line of code. This has real connotations for multiplayer games, as well as privacy nuts.
How will we use this tech?
You can even mark a spot for another device to find, accurate to within millimetres. That is a cool trick in your home. In a retail environment it’s the start of an app that will take you to each and every product and sound an alert when you’re near an item of interest. In a museum it turns your phone into an augmented reality tour guide and there are uses we probably will never think of until some bright spark points them out.
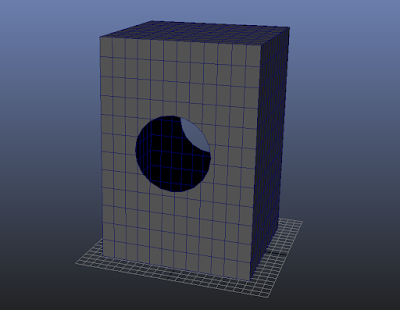
It also allows for serious augmented reality, which can be as simple as walking around your home with a VR headset on. It can also be as complex as working on a 3D print project, adding parts to a physical entity in virtual space before actually creating them.
We have already seen a version of Minecraft in the real world with Microsoft’s HoloLens. Using the phone’s camera and the VR system to produce augmented reality gives us the kind of options that we’ve been dreaming about.
It’s more than a tape measure
On a personal level you’ll be able to redecorate your home or see how a particular piece of furniture in a store would fit in with your current look or virtually remodel your bathroom. Google’s press information hailed the end of the tape measure as your phone will be able to measure between solid objects, but we feel this is wilfully selling this system short.
Then there is the mapping potential of 2 billion smartphones around the world. Inevitably not all of them will be Tango-enabled for some time to come. But once the privacy battles are fought and lost, every phone can contribute to an accurate map of every public space.
What does that mean? We honestly don’t know, but we do know that companies will fight over the data that this system provides and that Google’s data capture has just gone to another level. Advertising could become more context specific, your phone will know far more about you and your home and there will be more.
This isn’t just a sharper resolution to the technology we already have, it’s a new dawn.
This is really happening soon
It’s a developer tool only right now, but that will change in a hurry. Lenovo is set to release a Tango-equipped device soon and we’ll have to wait and see what difference area learning makes to our lives.
We already know, though, that it’s going to have a big impact.
[Read more...]

A 3D Printer Made This Building - And People Actually Work There


Dubai says it has completed the world's first 3D-printed office building.
While other construction projects have at least partly relied on 3D printers, the Dubai government says this entire building is printer-made, even the furnishings and interior designs. And it's not just for show: The office is supposed to be a functional workspace, with phone hookups, water, electricity and air-conditioning.
Situated inside Dubai's Emirates Towers complex, the single-story office measures 2,690 square feet and will be the temporary home of the Dubai Future Foundation, according to a press release. The building opened May 23.
Now, you're probably wondering: How big is the 3D printer that created this thing? It's a whopping 20 feet high, 120 feet long and 40 feet wide. (Imagine the nightmare it must be if it jams.) The jumbo printer completed the task by "extruding a cement mixture layer by layer," per Gizmag.
In addition to the large printer, smaller mobile 3D printers were also used.
All told, it took 17 days to print the basics of the building, and installing it onsite took only two.

The building cost just $140,000 to erect, thanks to minimal labor and costs involved in the construction process. The United Arab Emirates minister of cabinet affairs, Mohamed Al Gergawi, claims this was 50 percent cheaper than building it a more traditional way.
"It's not just a building, it has fully functional offices and staff," Mohamed Al Gergawi also said, per Reuters. "We believe this is just the beginning. The world will change."
Last year, China erected the world's tallest 3D-printed apartment building, which at the time was more of a showpiece than a functioning residence.
The Dubai building will become the permanent home of the Museum of the Future next year, according to Engadget.
The UAE and Dubai hope to become "leading global centres of 3D printing by 2030." Maybe by then we'll have entirely 3D-printed cities.
[Read more...]

This simple 3D printer is the one you might actually want for your home


Most 3D printers on the market, with their sharp, shiny innards exposed, look like they could put your eye out if you make one wrong move.
Compared to those clunky, industrial-looking competitors, the Glowforge — a device that uses lasers to slice through materials and create objects of your design — is the Easy Bake Oven of 3D printers.

The simple silver and white box lets users craft everything from leather wallets to chocolate bars by carving into a particular substance, rather than layering plastic goop into precise piles, like most traditional 3D printers do. Users need only lift the lid, drop their material inside, and load a pre-fab template or custom design.
Dan Shapiro, CEO and cofounder of Glowforge, tells Tech Insider that most 3D printers are like robots with glue guns. The Glowforge, on the other hand, is "a robot that has a lightsaber," he says.

The GlowForge "printed" these custom leather wallets.
Here's how it works: Users can design coasters, toys, leather-bound journals, and more using software like Adobe Photoshop, Illustrator, or Sketchup. They can even draw an image by hand. When they're satisfied with their concept art, the user then uploads the image to the Glowforge printing app and places the appropriate material into the machine.
A bird's eye camera inside the Glowforge autofocuses on the material. The device can recognize what it is — be it wood, plexiglass, fabric, or food — and orient the laser head accordingly. The camera also allows the user to preview and edit a design before the laser begins sculpting.
When everything's ready, just push the print button. A coaster is made in fewer than seven minutes, while more complicated projects may take a few hours.
When I discovered the Glowforge in May at the Bay Area Maker Faire in San Mateo, California, it was surrounded by the fruit of its loom: custom game pieces for Settlers of Catan and a Victorian-style dollhouse made of salmon-colored plywood. There was also a picture frame that Shapiro made as a last-minute Mother's Day gift for his wife.

There's a new way for fans of Settlers of Catan to geek out.
But each piece on display required additional assembly. Because Glowforge uses subtractive 3D printing technology instead of additive, it can only produce relatively two-dimensional designs. Those objects may be stacked or stitched together, of course, but hobbyists looking to make more complicated hardware or figurines will be better off with a traditional 3D printer.
Still, the Glowforge has racked up major support from amateur makers. It became the most successful 30-day crowdfunding campaign in history when it raised $28 million last fall.
Glowforge has twice delayed shipments, but hopes to start shipping in December. Users will then be able to buy raw materials for the Glowforge from the company's online store as well. It will likely mark up prices for those, however, trading cost for convenience. In most circumstances, designers can gather the materials they need at Home Depot.

The GlowForge can cut a variety of materials, even seaweed paper.
While 3D printers may be going mainstream, they remain a luxury item — the Glowforge is currently available for pre-order for $2,395, and will run about $3,300 upon launch. That's not chump change for a family looking to foster their kids' creativity, or for a young professional who runs an Etsy store on the side.
Shapiro hopes the Glowforge will nonetheless attract all sorts of makers.
[Read more...]

FELIXprinters Forms Partnership with Dubai-Based 3D Printer Reseller East Gate Global


Netherlands-based 3D printer manufacturer FELIXprinters announced today that they are forming a new partnership with East Gate Global, a 3D printer reseller based in Dubai. As part of the partnership agreement, East Gate Global will offer local support and distribution services for FELIXprinters in the United Arab Emirates (UAE) and in the rest of the Middle East region. Since its release in September, FELIXprinters’ flagship desktop 3D printer the Pro 1 has quickly become the company’s most popular model in the UAE. This new partnership is FELIXprinters’ first step in an aggressive expansion into the Middle East/Gulf Cooperation Council (ME/GCC) market.
While FELIXprinters’ Pro 1 3D printer has already been a hot seller in the UAE, shipments and service were still being handled primarily through the company’s IJsselstein-based headquarters in the Netherlands. Under the agreement with East Gate Global, the Pro 1 and other FELIXprinters products will have larger local warehousing in the region, which will result in faster delivery times, lower shipping and import costs, and local support services. East Gate Global will also contribute to local promotion of the FELIXprinters Pro 1 throughout the Middle East. Sales and promotion will primarily be handled through the new, recently launched East Gate Global web portal.
“We [ME/GCC] have had a lot of interest in 3D printing hardware over the past year as more and more businesses in the region are willingly to invest in affordable professional desktop printers – instead of the overpriced printing services and commercial-quality printers that are currently available. The affordable Pro series from FELIX printers finds itself to be in the right place at the right time,” explained Majed El-Mohtadi, the Managing Director of East Gate Global on his reasons for becoming the region’s official distributor.

FELIXprinters Pro 1.
FELIXprinters’ Pro 1 and the rest of their line of desktop 3D printers are surprisingly affordable, high-quality printers with several high-end features usually reserved for professional-grade machines. The Pro 1 has easy to remove and replace dual extruders with a clever smart nozzle positioning feature to prevent part collisions and misprints. The heated print bed is easily removable to allow for easy part removal and the ability to start a new print right away, and it offers a respectable 237 x 244 x 235 mm (9.3 x 9.6 x 9.25 inch) printing envelope, as well as automatic calibration and leveling. The Pro 1 also features a smart filament sensor feature that pauses the print job when filament runs out and notifies the user to change the spool. The Pro 1 costs about $2,400, right in line with most prosumer-quality desktop 3D printers with similar features.
“Even though there’s been a number of desktop 3D printers that have been commercially available in the region for a while now, it wasn’t until the FELIX Pro 1 did we begin to see the desktop 3D printer make its way to the actual offices of architects and engineers. Not only is the Pro 1 incredibly silent, but it’s surprisingly affordable for the exceptional quality materials that can be achieved with it,” continued Majed El-Mohtadi.
Here is some video of the FELIXprinters Pro 1 in action:
In general the Middle East has been slow to adopting 3D printing technology, which is uncharacteristic for the notoriously tech-savvy region. However there has been a growing movement among local businesses to encourage companies to begin offering more 3D printing options and technology to the Middle East and lower the entry cost, and it finally seems to be paying off. Not only are more 3D printer manufacturers making efforts to begin offering their products in the region, the local governments are finally starting to encourage local businesses to adopt the technology.
Recently, Sheikh Mohammed bin Rashid Al Maktoum, the Vice President and Prime Minister of the UAE, released his official strategy for developing new 3D printing technology and building a 3D printing capital in that region of the world. The detailed strategy has been coming more and more into play recently, as we have been closely following, as Dubai in particular embraces 3D printing.
“We are very excited to have East Gate Global as our official partner to create a solid base in the UAE. We see great opportunities for our existing and soon to be released 3D related products,” said the director of FELIXprinters, Wilgo Feliksdal, who co-founded the company with his father Guillaume Feliksdal.
Now that FELIXprinters has an official presence in the ME/GCC to offer local sales, service and support for their 3D printers, upgraded parts and filaments, they expect their marketshare to expand dramatically. According to the Feliksdals, they intend to capitalize on their partnership with East Gate Global, their support network and list of eager buyers to expand deeper into the region throughout countries like Saudi Arabia, Lebanon, Qatar, Iraq and Jordan by the end of the year. You can learn more about FELIXprinters line of 3D printers here, and if you’re in the Middle East you can contact East Gate Global here. Discuss further in the FELIXprinters Partners with 3D Printer Resellers in Dubai forum over at 3DPB.com.
[Read more...]

Return to top of page Tech Box 2016 - Email : leequyen596@gmail.com
Login