Reviews and share for a better life...

Alunar 3D Desktop Printer Prusa i3 DIY High Accuracy CNC Self Assembly


Alunar 3D Desktop Printer Prusa i3 DIY High Accuracy CNC Self Assembly

"Prusa i3 strength is in the possibilities of upgrading and modificating the printer itself."
It is a great piece of open-source hardware in case you want to dip deep into the fuzz of open-source 3D printing. That being said, if you want a 100% reliable, zero-maintenance printer, aim for more commercial types, I've learnt a lot from it in the terms of how do these machines work.
[Read more...]

QIDI TECHNOLOGY 3DP-QDA16-01 Dual Extruder Desktop 3D Printer


QIDI TECHNOLOGY 3DP-QDA16-01 Dual Extruder Desktop 3D Printer

Product Features
Fdm technology; dual Extruder; obtained CE,FCC, RoHS certificates; qidi technology is registered trademark by edify technology Inc
Aviation level aluminum plate its surface is completely flat and will NOT warp during heating process
Easy to Use software for simple customization of 3D models
Fully metal external frame much more stronger than PVC plate and wooden frame
New high heat resistant metal platform supports replace plastic supports
[Read more...]

The HATCHBOX 3D Printer User Guide : Software Setup


HATCHBOX Alpha 3D Printer reads GCODE output files. There are various free open source slicing software available to the public that you can use, as long as the file output is GCODE. In this section, we will provide you with the necessary information in order to set up HATCHBOX Alpha 3D to properly print with any open source slicing software you choose.
Enter the following specifications as the machine settings:
 3D Printer Type:
 o Delta
Machine Settings:
 o E-Steps per 1mm filament: 92 (over time this will need to be calibrated)
 o Maximum width (mm): 300
 o Maximum depth (mm): 300
 o Maximum height (mm): 330
 o Heated bed: Yes (check if applicable within the software)
 o Machine center 0,0: Yes (check if applicable within the software)
 o Build area shape: Circular
 o GCode Flavor: RepRap (Marlin/Sprinter)
Printer Head Size:
 o Head size towards X min (mm): 0.0
 o Head size towards Y min (mm): 0.0
 o Head size towards X max (mm): 0.0
 o Head size towards Y max (mm): 0.0
 o Printer gantry height (mm): 0.0
Communication Settings:
 o Serial port: AUTO (if your computer cannot detect the serial port, you can  manually select the serial port the 3D printer is connected to)
 o Baudrate: AUTO (if your computer cannot connect to the serial port, set  the Baudrate to 1152000 and restart Cura)
Nozzle Size (mm):
 o 0.40 mm
Filament Diameter (mm):
 o 1.75 mm
Shell/Wall Thickness (mm):
 o 0.8 (this can be adjusted based on the part being printed at increments of  the nozzle size)
Print Speed (mm/s):
 o 50
Print Temperature (C):
 o 190°C is ideal for HATCHBOX PLA
 o 220°C is ideal for HATCHBOX ABS
 *This is a general rule and will vary based on the ambient temperature the 3D  printer will be running.
Bed Temperature (C):
 o 60°C is ideal for HATCHBOX PLA
 o 100°C is ideal for HATCHBOX ABS
 *This is a general rule and will vary based on the ambient temperature the 3D  printer will be running.
Set Up is now complete and you are ready to print with the HATCHBOX Alpha 3D printer.
For better print quality, please visit your selected slicing software’s website in order to read the full definition for each setting, and to adjust the settings as needed.
[Read more...]

The HATCHBOX 3D Printer User Guide : Utilities Menu


In the Utilities Menu, you can rotate the Function Button to show you the statistical information of your print, as well as the total printing time, and filament printed.
 A. Current extrusion temperature / Desired extrusion temperature
 B. Current bed temperature / Desired bed temperature
 C. Filament extrusion flow rate
 D. Printing rate
 E. Buffer
 F. Print completion percentage
 G. X-Axis location
 H. Y-Axis location
 I. Z-Axis height
 J. Cooling fan speed rate
 K. Filament usage
 L. Print complete bar

The Main Menu is where you have access to the features of the 3D printer controls and adjustments.
There are 6 options within the Main Menu, as well as Sub Menus for each of the 6 options. This will be explained as a glossary. Rotate the Function Button left or right to highlight the option you want to perform. Then, push the Function Button to select and perform the option.
1. Back: Returns to the Utilities Menu
2. Quick Settings:
 2.1. Home All: Brings the hot end to the home position.
 2.2. Z Babystep: This parameter can be set adjust the Z-Offset during printing. Rotating
 the Function Button to the left will increase the Z-position. Rotating the Function
 Button to the right will decrease the Z-position. Once you have reached the desired
 Z-Offset, push the Function Button to save your setting.
 2.3. Speed Mul: Adjust the overall printing speed from what you have set in the slicing  program. This can be adjusted and saved during printing.
 2.4. Flow Mul: Adjust the filament extrusion flow rate from what you have set in the slicing  program. This can be adjusted and saved during printing.
 2.5. Preheat PLA: Preheats the hot end nozzle and build platform manufacturer  specification
 2.6. Preheat ABS: Preheats the hot end nozzle and build platform manufacturer specification
 2.7. Cooldown: Used to stop and cool down preheating, or to cool down the hot end
 nozzle and build platform.
 2.8. Disable Stepper: Manually disables the stepper motors.
 2.9. Load Filament E0: Automatically loads the filament once the filament is guided about half an inch into the PTFE tubing. Before using this feature, Preheating (PLA or ABS)  must be on and must have reached preheating temperature.
 2.10. Unload Filament E0: Automatically unloads the filament. Before using this feature,  Preheating must be on and must have reached preheating temperature.
3. Print File:
 3.1. Print File: Select the saved GCODE file to print via SD Card. This option will be
 available once the SD Card is inserted into the SD Card reader.
 3.1.1. Pause Print: Select to pause the print.
 3.2.1. Stop Print: Select to stop the print.
 3.2.1.a No: Conffirmation to continue with the print.
 3.2.1.b Yes: Confirmation to stop the print.
 3.2. Delete File: Select the saved GCODE file on the SD Card to delete the GCODE file. 
4. Extruder:
 4.1. Bed Temp: Can be used to preheat the build platform or adjust the temperature
 during printing.
 4.2. Temp. 1: Can be used to preheat the extruder hot end or adjust the temperature
 during printing.
 4.3. Turn Extr. 1 Off: Turns off and cools down the extruder hot end.
 4.4. Extr. Position: Controls the extruder movement. Recommended for advance 3D
 printer users.
 4.5. Set Origin: Sets the origin of the extruder hot end distance. Recommended for
 advance 3D printer users.
5. Fan Speed:
 5.1. Fan speed: Manually adjust the fan speed percentage during printing.
 5.2. Set Fan 25%: Preset option to set the fan speed to 25%
 5.3. Set Fan 50%: Preset option to set the fan speed to 50%
 5.4. Set Fan 75%: Preset option to set the fan speed to 75%
 5.5. Set Fan Full: Preset option to set the fan speed to 100%
 5.6. Ignore M106 CMD: This ignores the M106 GCODE command set in your GCODE file. GCODE M106 is the command is to set fan speed and start, which will generally
 be written as M106 S(0-255); M106 S127.
6. Auto Leveling (Always perform this function when the extruder hot end and build platform have cooled. When Test Leveling function is in use, always be prepared to manually power off the 3D printer as soon as possible to prevent any damage to the extruder hot end nozzle and build
 platform):
 6.1. Test Leveling: This will move the z-axis down to show you where the z-offset is
 currently set to (always perform this before printing).
 6.2. Auto Leveling: This will perform the automatic leveling function by taking three points of measurement on the build plate.
 6.3. Z-Position: This is where you can manually adjust the z-axis offset. By increasing the number, it will raise the z-axis. By decreasing the number, it will lower the z-axis closer to the build plate. For superior filament bed adhesion, the z-axis offset should be just high enough from the build platform in order to slide a standard A4-sized paper in between with just a bit of a tug. To increase the z-axis offset, rotate the Function Button to the left (increasing number is shown on the LCD screen). To decrease the z-axis offset, rotate the Function Button to the right (decreasing number is shown on  the LCD screen).
 6.4. Set to Z=0: This will save the z-axis offset you have set in “Z Position” function.
7. Configuration: Do not modify or warranty will be voided.
[Read more...]

The HATCHBOX 3D Printer User Guide : Lubrication, Screw Tension


Lubrication
To ensure the life of the rail, we recommend lubricating the linear rail every 200 hours or as needed.

Screw Tension
The 3D printer contains 12 core screws that will need to be fastened. Overtime, due to vibration and movement while printing, these screws may become loose. This will affect printing or may cause damage to the 3D printer. We recommend checking the screw tension daily.
[Read more...]

FLASHFORGE DREAMER 3D Printer User Guide : Loading & Unloading Filament


Filament must pass through the extruder and into the heating block in order to be melted. In this user guide, we will demonstrate loading and unloading filament using the left side extruder.
LOADING & UNLOADING FILAMENT
Loading Filament
1. Remove the lid of the Dreamer 
2. From the main menu, press the right icon labeled [ Tools ].
3. Select [ Filament ] and [ Load Left ].
4. Wait for the extruder to heat up to the operating temperature. The extruder will alert you once it is at the operating temperature. Load the filament by inserting it into the extruder at an upright angle.
5. Filament will start to extrude out of the nozzle. Continue loading to ensure that the filament is extruding in a straight line. Refer to the troubleshooting section if the filament is extruding at an angle.

Unloading Filament
1. Remove the lid of the Dreamer 
2. From the main menu, press the right icon labeled [ Tools ].
3. Select [ Filament ] and [ Unload Left ].
4. Wait for the extruder to heat up to the operating temperature. The extruder will alert you once it is at the operating temperature. Unload the filament by gently guiding it out of the extruder.
CAUTION: Do not pull on the filament as it will damage the gears.
[Read more...]

Bed leveling for 3D Printer ULTIMAKER 2 EXTENDED+


Bed leveling
As explained in the Get Started section the first layer of a print is very important. Therefore regular bed leveling is advised. Always re-level the build plate when you notice that the plastic is not equally placed on the glass plate. After transportation of your Ultimaker 2 Extended+, it is also advised to re-level the build plate to ensure your 3D prints stick well to the build plate.
To start the bed leveling process on your Ultimaker 2 Extended+, go to "Maintenance" > "Buildplate". Wait for the Ultimaker 2 Extended+ to do its homing procedure and continue when the print head is in the center at the back of the build plate.
Setting the height
Roughly set the height of the build plate by rotating the button at the front until there is approximately 1 mm distance between the nozzle and the build plate. The measurement here is not critical; just make sure that the nozzle is close to the build plate without touching it.
Rough leveling
Adjust the front left and front right build plate screw to roughly level the build plate at the front side. Again, there should be a distance of approximately 1 mm between the nozzle and build plate. Turn the build plate screws to the left to move the build plate closer to the nozzle.
Fine-tuning
The last step will be fine-tuning of the build plate with the calibration card. Place the calibration card between the nozzle and build plate on all 3 points and adjust the build plate screws until you feel slight friction when moving the card.
Note: Don't push on the build plate while fine-tuning with the calibration card. This will lead to inaccuracies.
[Read more...]

Unpacking the Afinia H800 3D Printer


The Afinia H800 3D Printer weighs over 40 pounds and should be team-lifted!
Remove the power cord and 4 perf boards from the top foam piece.
Remove top foam from the box. Lift the foam ring from around the printer.
With two people, carefully lift the Printer from the box.
Lift the foam sheet below the printer and remove the Accessory Pack,
Power Supply, Putty Knife, and Snipping Pliers.
Lift the top cover and carefully lift out the foam above the platform.
Open the front door and carefully remove the two pieces of foam from under the platform. Tip each foam piece back until it is lying flat, then turn the foam counter-clockwise until the left end of the foam is through the door.

Use the snipping pliers to carefully cut the 6 labeled retaining strap loops from around the Print Head rails near the top of the printer.
Cut only the straps!

Next, check the Accessories:

• Reel of Filament (1, Natural/White)
• Power Supply
• Power Cable
• USB Cable
• FR-4 (Perf) Boards
• Extra Nozzle
• Nozzle Wrench
• Hex Wrenches
• Putty Knife
• Snipping Pliers
[Read more...]

FLASHFORGE DREAMER 3D Printer User Guide : Single & Dual-Extrusion Print


Single-Extrusion Print
1. Open FlashPrint by doubleclicking on the icon.
2. Click on [ Load ] and choose an .stl file from hard drive.

3. The object will then be shown on the screen. 

4. Click on the object and then click on [ Extruder ], select [ Use left extruder ].

*Left extruder will be used for illustration purposes.
5. Now the 3D model is ready to be created. 
Dual-Extrusion Print
1. Open FlashPrint by doubleclicking on the icon.
2. Press [ Load ] and choose an .stl file from hard drive.

3. The object will then be shown on the screen.

4. Press [ Load ] and choose another (or the same) file from hard drive.

5. Click on the object and then click on [ Extruder ], select [ Use left
extruder ].

NOTE: One object is turned to green, that indicates it will be print with the left extruder. 
6. Now the 3D model is ready to be created. 
[Read more...]

3D Printer User Guide : Mesh details


Submit a request to process your scene at a different resolution. Also, learn the basics of mesh cleanup and synchronizing with the server.
[Read more...]

The AppCam Pan/Tilt HD Indoor WiFi Camera OVERVIEW


Uniden’s AppCam system works with your smartphone or wireless device to create a powerful home security network. No PC interface is needed to view video on your smartphone or wireless devices. Set up the camera network on your mobile device and install the cameras; your network is up and running. 
The wireless AppCam offers superior quality video with true color. It is suitable for day or nighttime use.
Also, as dust, grime, and cobwebs accumulate on the camera glass, they can reflect light from the infrared LED and might lower video quality. Periodically clean the lens glass with a soft cloth.
FEATURES
System
• No PC required
• Direct connection to router
• WiFi connection to router
• P2P connection
• Records HD 720P up to 20fps
• Manual/motion recording to microSD
• Supports up to 32GB microSD
• High quality H.264 video
• Two-way Audio
AppCam Pan/Tilt Indoor Camera
• IR cut filter switch
• Night vision range – 25 feet
• Built-in microphone and speaker
• microSD card slot
Uniden’s AppCam App
• Multiple camera viewing and management from single app
• Remote access to recorded video
• Remote snapshot & recording control
• Event notification/email alert
WHAT’S INCLUDED

If any items are missing or damaged
contact our Customer Care Line immediately at +1-800-658-8068.
Never use damaged products!
PARTS OF THE CAMERA
[Read more...]

Buying a 3D Printer? - What You Need to Know


With the number of desktop 3D printers sold annually expected to see grow by a staggering 750% by 2019, and with the number of different machines on the market mushrooming over the last two years, it has come to our attention that an ever growing number of consumers are simply becoming overwhelmed. Way back in 2012 when I first purchased a 3D printer there were only a handful of reliable machines available on the market. Fast forward to 2015 and there are literally hundreds. Priced anywhere from $249 all the way up to thousands, I, myself, even feel a wee bit overwhelmed when friends ask me what they should buy.
If you are in the market for a new 3D printer, then there are a lot of decisions ahead of you. We’ve decided to put together a small guide which can be used in conjunction with our “Best 3D Printers of 2015” review article to hopefully help you select and buy the 3D printer which suits you and your activities best.
Buying a 3D Printer – A Starting Point…
When the typical consumer sets out to purchase a new 3D printer, they usually start with Google, or head directly to Amazon. Both are great starting points, but from a research perspective only. Use Amazon initially to read reviews on each product, noting that there are cheaters out there and not every review is legitimate. Next you should head over to the 3D Hubs 3D Printer review page, which takes into account, according to the company, 2,279 reviews, 335 writing hours, 1,623 years of experience, and over 317,000 individual prints to present a full picture of the consumer 3D printing space. Note that there is a ton of information on Amazon, Google, 3D Hubs. It’s impossible to take it all in, but very important that you spend time at least learning about the machines which consistently receive the better user reviews.
Price Doesn’t Mean Quality

Next it’s time to determine your budget. Money doesn’t grow on trees, but plastic objects do grow on all 3D printers. Don’t let the price tags fool you. There are many excellent machines available for under $1000, and a handful of great r3machines one can pick up for under $600. Don’t think that you need to spend $3,000 to really get involved with 3D printing. Price does not equate to quality all the time. I’ve used $500 printers which I thought worked better than $1,800 machines, while I’ve also used $500 machines which I would have been better off dropping off at the landfill than in my garage. Once again it all comes back to reading reviews and understanding what you need the printer for.
Money Spent Now = Money Saved Later
Contrary to what we just stated in the previous bullet point, oftentimes spending a little bit of extra money now could equate to savings in excess of that amount down the road. Let me explain…
I have 8 3D printers now. I like trying new machines and also received a few for review articles we’ve done. While price does not always mean quality, there have been a couple machines that I received which retail for around $500. One of these machines, in my opinion, was a total waste of time. I ended up spending $100 in filament alone because every time I left the the printer for a r2few hours to do its thing, I would return to find a 3D printed Salvador Dalí murder scene in my garage with melted filament strands strewn across the build plate like someone’s intestines had just ruptured. Frankly if you were to purchase this printer (I won’t mention the name right now) you’d likely be forced to buy a new one within months. Avoid such a mishap by reading reviews thoroughly!

Understand Your Abilities
This is one of the most important points. Those jumping into 3D printing for the first time, with little to no experience, often purchase the cheaper machines. While many of these machines work exceptionally well, a majority of them are very rudimentary. If there is a problem it might not be so easy to fix, and likely there are no features such as print bed auto-calibration, cloud-based printing, WiFi connectivity, etc., which make 3D printing a bit easier for the beginner. On the other hand if you have had experience with machines like these before, or are a mechanical genius, then it might r4benefit you to buy one of the more rudimentary, affordable 3D printers out there.
Know Your Ultimate Goals:

Like I’ve mentioned before, there are hundreds of 3D printers out there to choose from. Just like with any other major purchase, whether it’s a car, smartphone, or computer, not every item is right for you. You likely wouldn’t buy a sports car if you had a family of 7, just like you wouldn’t buy a minivan if it’s just you and your wife. 3D Printers are the same. Many of the machines and the technologies behind them are suited for specific uses. It’s important you understand the differences between each particular feature, technology, and specification. Spend some time learning about 3D printers in general before you even begin considering a purchase.
Buying a 3D printer can be an enjoyable, but oftentimes scary experience. If you come in prepared, invest the time necessary in researching the industry and understanding your needs, you’ll likely find a printer which provides years of useful fabrication.
[Read more...]

How to enter my Unlock Code for BlackBerry Storm ?


Model : BlackBerry Storm 9300 and 9350
Follow all the steps very patiently and carefully.
Instructions - Step by Step
   1. Insert ANY Sim Card in the Phone's Sim Card Slot.
   2. From the Home Screen, Press the Menu Key (Blackberry Key), and Select 'Manage Connections'.
   3. Turn OFF all of the Wireless Connections.
   4. Go Back One Step by Pressing the Back Key.
   5. Select Options.
   6. Select Advanced Options.
   7. Select SIM Card.
   8. Press the Menu Key Select 'Show Keyboard'.
   9. Tilt the phone in Horrizontal Position so that the Keyboard is displayed in the Landscape Mode.
  10. Enter letters M E P D (you will not be able to see the typed info).
  11. Enter letters M E P and then the number 2.
  12. A Message will say "Enter Network MEP Code".
  13. Enter the Code provided by us to you and Press the Enter Key on the Screen.
  14. It will now say 'Code Accepted'.
  15. Congratulations! Your phone is now Unlocked.  Now your phone can be used with any GSM Network with Sim Card.
  16. Go back to the Home Screen.  Press the Menu Button and click on Manage Connections.
  17. Turn all the Connections ON.
  18. Click on Mobile Network Options > Network Technology: - Change GLOBAL to GSM/UMTS | Below that you will see - Network Mode: - Change from | 3G and 2G | to | 2G |.
      In Some Cases, the Phone might need to be Rebooted/Restarted with a Valid and Active GSM Sim Card placed in the Phone's Sim Card Slot.
You must follow Steps 16, 17 and 18 to switch the phone from CDMA (Verizon) mode to GSM mode.
IMPORTANT: Kindly Leave Me a Positive Feedback with 5 Detailed Stars; If you bought this code on my eBay listing, so other customers know how fast and accurate i am, and how happy you are with my service!
If it says ''Activation Required'' or your own Mobile Number doesn't appear on the Dial Pad Screen then follow these instructions below.
Go to the Dial Pad Screen and press # # 0 0 0 0 0 0 and press the Send button.
You will then see a menu come up. Erase everything on the first row and Input YOUR number.  Press the Menu Key and click Save.
The phone will now reboot and ''Activation Required'' will no longer be displayed.
[Read more...]

PUSH MOWER BUYING GUIDE


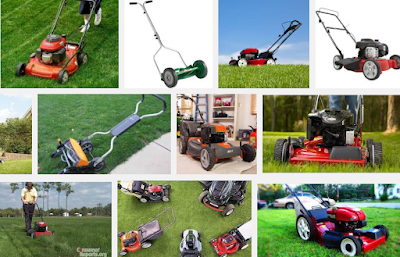
How To Find The Perfect Push Mower For Your Needs
Buying a lawn mower may seem like a routine task. But to ensure that you buy the lawn mower that best meets your specific needs you’ll want to factor in the size of your yard, whether your yard is hilly or flat, the number of trees or other obstacles to mow around, as well as the needs of the person doing most of the mowing.
There are many different lawn mowers on the market to meet a variety of lawn mowing needs. A mower that is perfect for your neighbor may not be the right one for you.
To find a mower that meets your needs, follow the tips we’ve assembled for you in this helpful buyer’s guide
What Mower Is Right For You, Push or Self-Propelled?
Push Mowers are ideal for flat yards under ¼ acre. Their cutting deck ranges from 20-22 inches, which is the perfect size to quickly and efficiently make your lawn look beautiful. If you are in good physical condition this may be a great way to save when purchasing a new lawn mower.
Self-Propelled Mowers are perfect for yards up to ¾ acre. The mower actually pushes itself to reduce fatigue that may come with a push mower. You simply walk behind the mower to control its path. Self-Propelled lawn mowers offer both front and rear wheel drive to better suit your yard. See below to determine which is right for you:
Front-drive push mowers are remarkably easy to maneuver and turn. Swivel front wheels make this possible by allowing easy 180-degree turns. These are perfect for smaller yards with numerous obstacles.
Rear-wheel drive mowers have better traction on hills and better steering control, but may make it a little harder to make sharp turns. These mowers are suited for open yards with steep hills.
If your lawn is larger than ¾ acres you may want to consider a Riding Lawn Mower.
Lawn Mower Features: Choosing The Features Right For You
Starting Systems - An easy-starting lawn mower is one of the most important features to get the job started right. That’s why selecting the right starting system is vital in ensuring you a hassle-free lawn mowing experience.
Electric Starting Systems eliminate pull starts all together. Simply prime the engine and turn the key for quick, dependable starts without any maintenance required.
Automatic Choke Starting Systems come ready to run. Simply engage the safety handle and pull the starter rope for a hassle free start that completely eliminates priming or choking.
Primer Starting System pumps the exact amount of gas into the carburetor to allow quick and easy one pull starts.
No Prime. No Choke. No Problem The ReadyStart™ system from Briggs & Stratton helps eliminate the strain and the hassle of starting your lawn mower. Manual priming and choking are now a thing of the past. Simply pull the rope and mow. The ReadyStart™ system makes starting Briggs & Stratton power products easier and faster.
What To Do With The Clippings
Bagging is a technique used to catch cut grass. They are available as both rear and side bagging mowers. Rear bagging mowers give you more maneuverability around trees and landscaping throughout your yard. Bagging leaves you with a fresh looking lawn every time you mow.
Mulching mowers use mulching blades that cut the grass into fine piece and return them to your lawn to act as a natural fertilizer. This works to enhance your lawn and does not require any extra time or money. It also eliminates the time you may spend emptying the grass out of a bagging mower.
Additional Features
Leaf-Handling Capability. These mowers suck up, shred and catch leaves with a screen that goes between the cutting blade and the discharge chute. Several newer mowers offer this unique feature.
Sound Quality: Briggs & Stratton offers specially designed mufflers to reduce to the sound of your mower during operation.
Durability: When purchasing a lawn mower, look for engine features like Maxi-Clean™ filters and overhead value technology (OHV) that help make your lawn mower engine last a lifetime.
Safety Tips: Be Careful Out There
According to the US Consumer Product Safety Commission, more than 60,000 injuries are treated by hospital emergency rooms each year because of unsafe operation of power lawn mowers. Kids under the age of 15 are the most common victims. Regardless of which mower you choose, don’t forget to practice safety. We’ve assembled some guidelines below to help keep you safe while using your equipment:
Always wear protective eyewear.
Mow only in daylight, when the grass is dry.
Check your yard for any debris or objects, such as toys that could pose a hazard if you mowed over them.
Keep you children and pets out of the mowing area.
Never let the starter rope snap back when starting a mower.
Look three to four feet directly ahead of you while mowing.
Never tilt a mower; always keep all four wheels on ground.
Take special care when mowing hills and inclines:
With your push mower, always mow across an incline or hill
Always turn off mower when crossing a sidewalk or driveway.
Never adjust mower height, clean grass chute, remove grass catcher or repair the mower while the engine’s running.
Never de-activate safety devices.
Never pull mower towards you.
Always stay clear of a hot engine. Mufflers can reach up to 1,200˚F.
Always read your Operator’s Manual thoroughly before operating the mower.
Children under 12 should not operate a push mower.
Maintenance Tips: For Long Life and Safety
Lawn mowers are built to last. However, as with any power product basic maintenance can be the difference in ensuring that your investment lasts a lifetime. Below is a basic maintenance schedule that should be followed by every lawn mower owner:
Check Oil Level - Every 5 hours
Change Oil - 50 Hours or every season
Replace Oil-Foam Element- 25 Hours or Every season
Replace air-cleaner cartridge - 25 Hours or Every season
Clean cooling system - 100 Hours or Every Season
Inspect spark-arrester - 50 Hours or Every Season
Replace in-line fuel filter - 50 Hours or Every Season
Replace spark plug - 100 Hours or Every Season
Clean combustion chamber deposits - Every 100-300 Hours
[Read more...]

Tips for Buying a Smartphone


Purchasing a smartphone is exciting, but it can also be overwhelming to many buyers. Numerous makes and models exist. Buyers also must navigate complex computer language to determine which features and systems are necessary. While this decision can be complex, it is one worth making carefully only after considering all factors since these phones can be expensive. Many of the best models of smartphones are available on eBay from numerous vendors. To buy a smartphone, buyers should consider a few tips to help them to navigate the more complex aspects of this buying decision. That way, the buyer purchases a cell phone that lasts for years and provides excellent service.
Focus on Operating Systems
The operating system is the brain of the smartphone. The most common options include the Android smartphones, Apple iOS systems, and Windows mobile devices. Individuals often select the iOS system because they want the benefits of an iPod in an iPhone. This system also features the Safari web browser. Individuals purchasing an Android phone have access to a wide range of programs and browsers since this is a more flexible platform. The Windows-based smartphones allow users to benefit from having access to Office products, including Word and Excel, on their phones.
Consider Brands and Models
For many people, buying a smartphone often comes down to buying the latest model or the most advanced phone. When considering some of the larger brands in the industry, factor in aspects such as features, flexibility of use, and availability on a particular phone carrier.
Numerous other brands and models exist. When selecting one to buy, individuals need to consider how they plan to use the device. Some models, including the Galaxy, Note, and Droid phones are known for their improved communications, making them a good option for business use. The Apple iPhone 5, for example, is a comprehensive media device, aimed at the individual user who wants access to photos, music, and the Internet.
Factor in Connectivity Options
When purchasing a smartphone, many people consider the phone carrier they intend to use. However, it is also important to consider the number and type of connection tools available to the user through the phone. Many smartphones have ample features when it comes to connectivity.
Bluetooth and Wi-Fi
A Bluetooth smartphone allows individuals to connect to any device featuring Bluetooth technology. Wi-Fi smartphones allow the user to switch off mobile data, such as 3G or 4G networks, and to use in-house Internet-connectivity. This can reduce costs.
Other Connection Options
Some smartphones connect through USB ports. For a user who travels internationally, a Global System for Mobile Communications smartphone, also known as a GSM smartphone, is ideal. It is important for users to consider usability with their preferred carrier, too.
Determine Which Features are Ideal
Based on the way the buyer plans to use his or her smartphone, it is essential to consider features. Some people have preferences to one style of phone or another. Technology continues to update and new features continue to become available.
Keyboards
A QWERTY keyboard pulls out from the phone and allows the user to type on keys, much like a traditional computer keyboard. Many people purchase touchscreen smartphones. These have built-in keyboards that operate based on an on-screen keyboard.
Cameras
Smartphones with cameras are very common. The quality of the camera tends to differ from one model to the next. When comparing options, buyers need to factor in the number of megapixels, the zoom quality, and the overall quality of images. Many also feature video cameras and media players to allow for on-screen viewing.
How to Buy a Smartphone
The selection of a smartphone requires the buyer to consider his or her desired features and specs. With numerous options available on eBay, buyers have the ability to easily compare various makes and models online and within a matter of seconds. To do so, buyers can visit any page of the eBay website and use the search bar on the screen to locate a specific brand, style, or operating system available. Then, the consumer can navigate through various vendors to locate a new or used cell phone, a locked or unlocked phone, or one with specific features. By comparing numerous options, it is possible to narrow down the buying decision until the ideal investment is possible.
[Read more...]

Yuneec Typhoon Q500 4K review


Camera options for your average consumer drone are limited to either a mount for a GoPro or similar camera or a built-in camera that is permanently attached to the drone. The former is fine, though it may or may not give you a first-person view (FPV) from the air and it's one more thing to keep charged (and you'll have to figure in the extra cost of the camera). The latter, however, means you've got no upgrade path should a better camera come along, and it can only be used with the drone.
Yuneec's Typhoon Q500 4K is not your average drone. Slung from the belly of the $1,300 quadcopter (£960 AU$2,200) is a 4K-resolution camera combined with a three-axis antivibration gimbal. When not in the air, the camera-and-gimbal system can be quickly removed and attached to the included SteadyGrip, a battery-powered handheld mount that lets you use the Typhoon's camera on the ground. Combined with an iPhone or Android smartphone, you can shoot completely control the camera and see what you're shooting. (Yuneec makes an updated and improved version of the SteadyGrip called ActionCam with a built-in rechargeable battery and the Q500 4K's CGO3 camera.)
The DJI Inspire 1 series takes a similar approach, but it's targeted at professionals and starts at about $2,700 for the drone and the handheld camera mount is an additional $270. The Typhoon Q500 4K is a better option for beginners, giving you an aerial and ground imaging solution that, while maybe not as feature-filled as some competing models, does what it does very well.
Design and features
The Q500 4K is big. Not like "How does that thing get off the ground?" big, but next to the relatively compact DJI Phantom 3, it's big. (The diagonal motor-to-motor measurement is 390mm for the Phantom compared to the Typhoon's 510mm.) The size does make it easier to spot in the sky from a distance, but you're not sliding the Q500 4K easily into a backpack for a trip to the park.
Instead Yuneec packs everything into a large, sturdy case. Along with the drone and its camera you'll find two batteries and a charger; two sets of propellers; the ST10+ controller, a neck strap and sunshield; a cable to use the charger in a car; and the SteadyGrip handheld mount. Unfortunately, Yuneec used Styrofoam inside the case instead of something a bit more long-lasting.
The Styrofoam is representative of the design and build quality on the whole: it's a good package overall, but lacks some polish. The black-and-gray plastic body looks nice, but pick it up and it feels a little flimsy. It's great that the camera can be removed, but to do it you have to keep plugging and unplugging this small cable and pushing in a plastic tab, both of which I feel might not last with frequent use. Nothing that's a deal breaker, but a little disappointing.
The controller for me is definitely a plus, though. Instead of relying on a tablet or smartphone for a live view from the camera as well as flight information, the ST10+ has a built-in 5.5-inch touchscreen display built right in. There's a bit of lag between the camera and screen, so I wouldn't recommend flying by FPV alone, but for setting up shots and giving you telemetry data at a glance it's great. It also means you only have to worry about having the controller charged, not a second device.
Having the fixed screen does mean you can't go with a larger tablet display, but since the drone doesn't support waypoint navigation -- where a larger screen to set up an autonomous flight path comes in handy -- and FPV flying isn't a great idea, it's not a big loss.
The controller also has buttons for starting and stopping video recording and snapping photos and sliders for setting the camera angle and limiting overall climb/descend and directional speed. A switch lets you move between flight modes: Smart, Angle and Home.
Smart mode is made for beginners. In addition to enabling a virtual barrier called a geofence to prevent it from flying more than 300 feet away from the pilot, the controller will always move the Q500 4K in the direction the right-hand control stick is pushed relative to the pilot and no matter which way the nose is pointed. It's fine if you've never flown before and you use it just to get a feel for how the quadcopter will fly, but I don't recommend using it much beyond that.
However, Smart mode is the only way you can use two of the drone's main attractions: Follow Me and Watch Me modes. With Follow Me, the drone uses a GPS signal from controller to follow whoever or whatever is carrying it. Watch Me mode works similarly, but keeps the controller -- or whoever's holding it -- framed in the camera no matter where and how it moves and the camera can automatically tilt according to the controller.
Carrying around a big controller doesn't make for the best video, though, so Yuneec developed the Wizard remote control. It's about the size of a TV remote, but can completely control the drone with simple gestures and a directional pad. It also has GPS in it, so it can be used with the Q500 4K's Follow Me and Watch Me functions.
If you want to actually pilot the Q500 4K normally, just switch into Angle mode. This will move the drone in the direction the control stick is pushed relative to the nose of the aircraft. As long as you've got a lock on six or more GPS satellites, the Q500 4K will automatically hold its position and hover in place when the right-hand stick is centered.
The Home mode is the drone's return-to-home safety feature. Flip the switch down and as long as the drone has a solid GPS lock and there are no obstacles in the way, it will fly back to within 13 to 26 feet (4-8 meters) of the pilot and automatically land.
Flight
Setting up the Typhoon Q500 4K for flight is about as simple as it gets. Spin on the props, charge up the batteries for the drone and controller and you're done. The controller, which is running on Android, takes a minute to boot up and then, once you've turned the drone on, it takes another minute for the two to finish connecting. GPS satellite acquisition -- required for hovering in place and return-to-home among other things -- takes a little more time. All told, it took me about 3 to 5 minutes until it was ready to fly, basically depending on how fast I could lock onto more than six satellites.
There is no automatic takeoff, but the procedure is simple enough: Press and hold a button on the controller to set the motors spinning and press up on the left stick. There is also no automatic landing, though you can just switch to Home mode and it will land for you. Honestly, other than bouncing a bit when it's close to the ground, the Q500 4K is stable enough for beginners to take off and land without issue.
As long as it's locked onto plenty of satellites, flying is easy. It's not particularly zippy, but that's kind of a plus when you're learning to fly for smooth camera movements. It is remarkably quiet, too. Yes, you'll still hear it, but it's more like the sound of a fast-spinning fan than an electric leaf blower.
I occasionally experienced some erratic flight behavior, but calibrating the drone's compass seemed to straighten it out. The procedure isn't difficult, though the drone's size makes it awkward since it involves turning and rotating the copter several times. Also a recent firmware update improved performance all around. (That procedure requires little more than connecting the Q500 4K to a computer via USB.)
All in all, flying the Typhoon is a pleasurable experience. Flight times for me averaged around 20 minutes before the controller started warning me to land, which is typical battery life at the moment for this category. Perhaps because of its larger size, it moved smoothly and while there is some lag between the camera and the what's displayed screen, the controls were responsive.
Video quality
Yuneec gives you several resolutions to choose from for video, the highest being 4K Ultra HD (3,840x2,160 pixels) at 30 frames per second, but also does high-speed video in full HD (1,920x1,080 pixel) at 120fps for slow-motion. It records at a high bitrate of 50Mbps, and it shows in the details. Subjects look sharp (maybe a little too sharp), though on my camera subjects on the far left side appear softer.
The three-axis gimbal does a fine job of keeping the camera stable, so even if you're not making steady moves with the drone it won't show in your clips. You'll still see some of the effects of rolling shutter, but that's typical for the category. The video is best viewed at small sizes in general, so if your goal is to share your videos online and watch them on a phone or tablet, the Q500 4K's camera will yield some excellent clips.
Conclusion
Thanks to some useful accessories and a solid feature set, the smooth-flying, easy-to-use Yuneec Typhoon Q500 4K quadcopter is a compelling package for video and photos in the sky or on the ground. The design is a little rough around the edges, and if you want autonomous flight features like waypoint navigation, you're out of luck. Otherwise, this is one nice drone for the money.
[Read more...]

Return to top of page Tech Box 2016 - Email : leequyen596@gmail.com
Login